


Have you ever seen that cool, frosted-glass look on some modern desktops and wondered how to get it on your own computer? That’s the Windows 12-style background blur effect — and even though Windows 12 isn’t officially out yet (as of April 2025), you can still bring that sleek, futuristic design to your Windows 10 or 11 setup.
Table of Contents
In this guide, we’ll show you how to give your PC that modern blur effect using some easy, free tools. Whether you’re looking to upgrade your desktop’s style or just want something fresh, this tutorial is simple to follow and safe to try.
What is the Windows 12 Blur Effect?
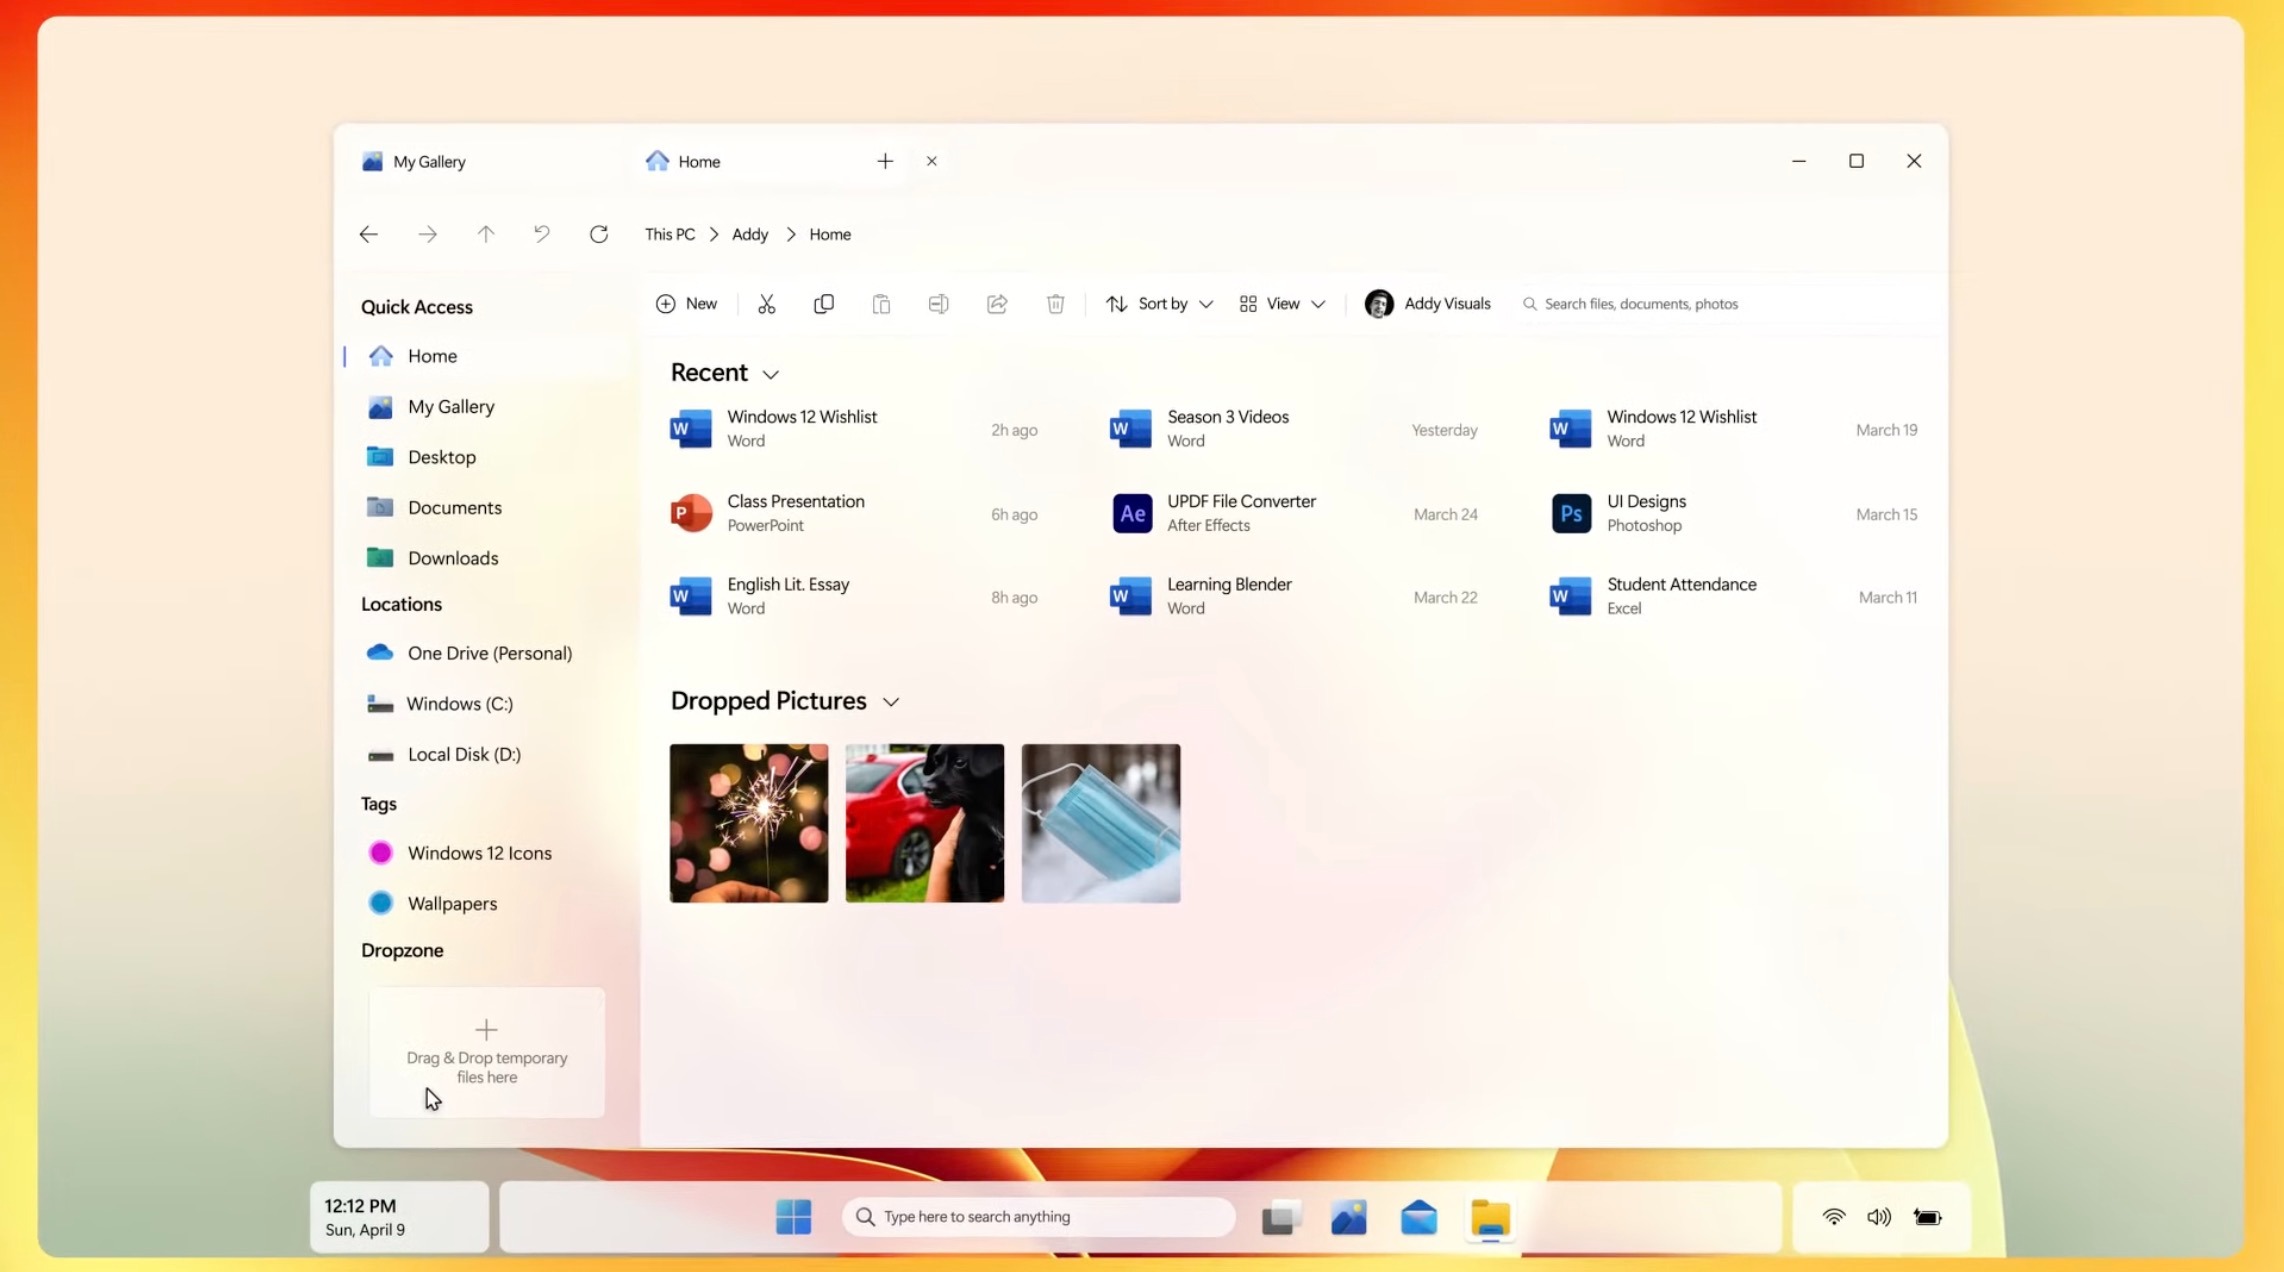
The Windows 12-style blur effect is all about making your desktop look clean and modern. It uses a translucent, blurred background — kind of like looking through frosted glass — which gives your windows and menus a floating effect.
It’s similar to the “acrylic” or “mica” effects you might’ve seen in Windows 11, but goes a step further by applying blur to more parts of the system, like the File Explorer, taskbar, and right-click menus.
While Windows 10 and 11 do have some built-in transparency, they don’t go as far as this. That’s why we’re going to use a third-party customization tool to help make it happen — safely and easily.
Get Your PC Ready
Before you start installing anything, let’s make sure your computer is ready to handle the changes. Here are a few things to check:
- Update Windows: Go to Settings > Windows Update and make sure you have the latest updates installed.
- Check System Specs: Your PC should have at least 4GB of RAM and a modern graphics card for the blur effect to run smoothly.
- Create a Restore Point: This lets you undo changes just in case something goes wrong. To do this, go to Control Panel > System > System Protection, and click Create.
- Temporarily Turn Off Antivirus: Sometimes antivirus software can block these tools, even though they’re safe. Just turn it off during installation, then turn it back on after.
Doing this will make the installation process smooth and help avoid any issues later.
Download & Install the Blur Effect
Now for the fun part! You’ll need to download a special customization tool (we’ll call it the “Windows 12 Style Pack”). It’s lightweight, free, and designed for Windows 10 and 11.
Here’s how to install it:
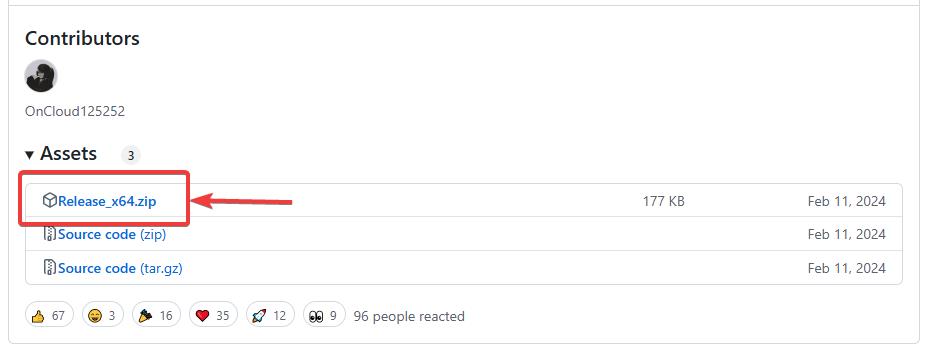
- Download the Pack: Visit this link and download the ZIP file. Make sure you’re using a trusted source.
- Extract the Files: Right-click the ZIP file and choose Extract All. Save the contents somewhere easy to find, like your Desktop.

- Copy to Program Files: Open the extracted folder, copy all the files (Ctrl+C), then go to C:\Program Files, and paste them there (Ctrl+V). You might see an admin prompt — click Yes.
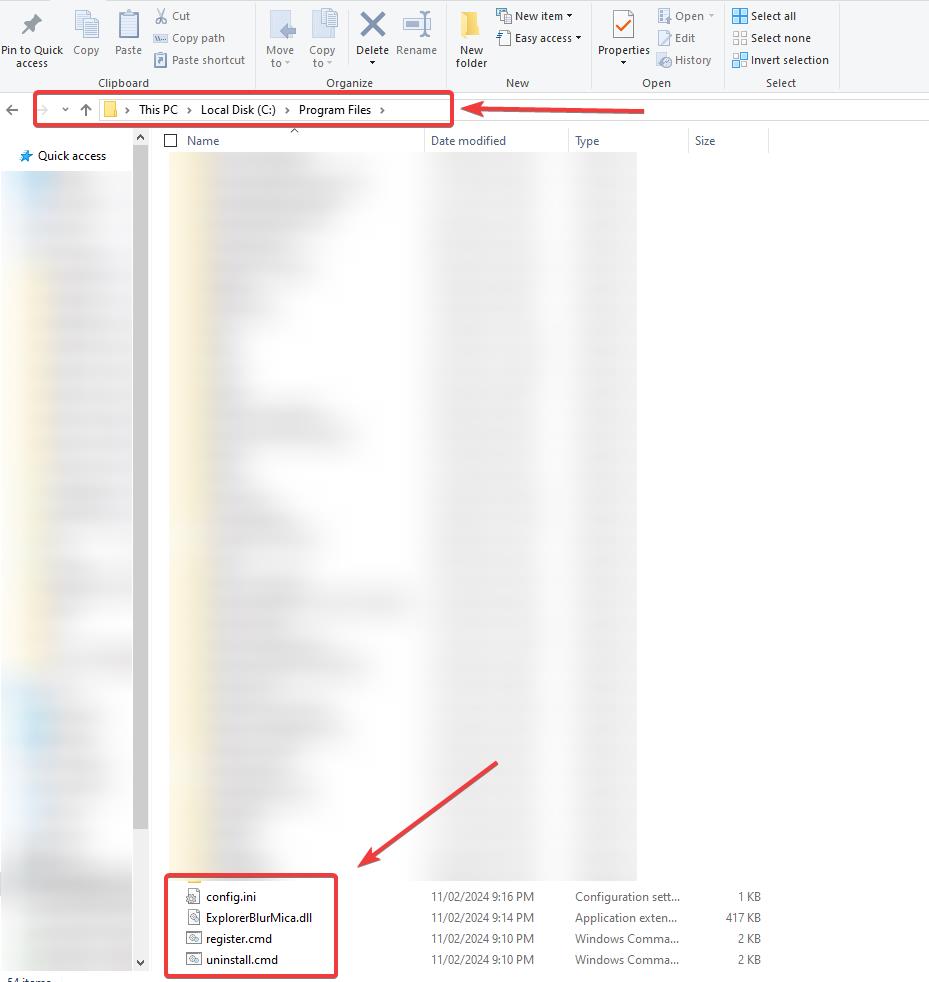
- Run the Installer: Find a file named
install.exein that folder. Right-click it, select Run as Administrator, and follow the instructions. - Restart Your PC: After installing, restart your computer to apply the blur effect.
Once your PC restarts, you should see the blur applied to your taskbar, File Explorer, and menus. It’s a small change that makes a big difference in how your desktop looks.
Customize the Look
The tool you just installed comes with a simple configuration app. It lets you tweak how the blur looks so you can make it match your style.
To open it, just search for “Windows 12 Blur Config” in your Start menu.
Inside the tool, you can:
- Adjust Blur Strength: Make the background more or less blurry with a slider.
- Add Color Tint: Apply a soft color over the blur — great for matching your wallpaper.
- Choose What to Blur: You can pick which parts of Windows should have the blur effect — like just the taskbar, or everything.
- Improve Performance: If your PC feels a little slow, turn on “Lite Mode” to use fewer system resources.
Don’t forget to check for updates once in a while — developers often release new versions that improve performance or add more customization options.
How to Uninstall (If You Ever Want To)
If you ever decide to go back to the original look, removing the blur effect is just as easy.
Here’s what to do:
- Find the Uninstaller: Go to C:\Program Files and look for
uninstall.exe. - Run as Admin: Right-click it and choose Run as Administrator.
- Follow the Prompts: It will guide you through removing everything.
- Restart Your PC: This final reboot will fully restore your original Windows setup.
And don’t worry — if anything seems off, just use the restore point you created earlier to roll back your system.
Pros and Cons of the Windows 12 Style
Like anything, this upgrade has its ups and downs. Here’s a quick look:
Pros:
- Modern Look: Makes your desktop feel new and clean.
- More Focus: The blur helps hide background distractions.
- Customizable: You control how it looks and works.
Cons:
- Performance on Older PCs: Might slow things down if your computer isn’t very powerful.
- Possible Antivirus Warnings: Some antivirus tools don’t like third-party UI tools (but this one’s safe if downloaded from the right place).
- Not Official: Since it’s not a Microsoft feature, you have to install it yourself.
Most users find the look and feel worth the tiny bit of effort it takes to set up!
Final Thoughts
If you’re tired of the same old Windows interface, the Windows 12-style background blur effect is a fun and easy way to upgrade your experience. With just a few clicks, you can give your desktop a sleek, futuristic feel — no need to wait for Windows 12 to launch.
So go ahead, give it a try! Download the pack, follow the steps above, and enjoy the new look. If you like what you see, share a screenshot in the comments and let us know how it turned out!

Leave a Comment